My Sublime Text Setup
• by • in categories: training, web development
A couple of months ago I produced a video course for lynda.com about the Sublime Text programmer’s editor, “Up and Running with Sublime Text 2”—sample videos below! One of the best things about producing a course or writing a book is that you get to know your subject really well, so after a couple of friends asked me today what I recommend when setting up Sublime Text for the first time, I thought I’d write it up here.
Make it Look Nice
I hate to say it, but Sublime Text looks like ass out of the box. If you’re coming from Vim you might not mind so much, but one of the reasons I prefer an editor with a graphical interface is that I get to look at something relatively pretty all day.
Sublime Text’s default icon is a rare miss from The Iconfactory. Fortunately there are plenty of good alternatives out there. Jerod Santo has a nice post with many of the best options, from minimalist choices like Adam Kiss’s abstract design…

…to carefully rendered images like Kreg Wallace’s lickable lime segment.

My personal favourite alternative icon comes with a new alternative theme that I’ll come to in a moment: Flatland.

The remaining two elements that you’ll need to make Sublime look good are a user interface theme and a code colour scheme. Depending on what kind of coder you are, you may have a deep-rooted preference for your colour scheme already, in which case you’ll want to find a UI theme that matches that preference. Otherwise, you might want to start with a UI theme that appeals to you, and choose a color scheme that goes with it.
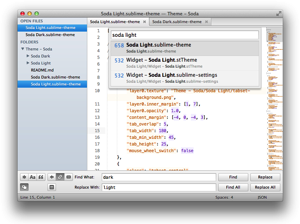
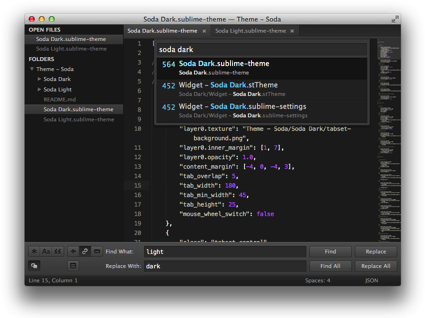
The Soda Theme is the best known UI theme out there. It comes with dark and light variations, has Retina quality assets, and options for round or square tabs, and folder icons in the sidebar. While I used Soda Light, my preferred colour scheme was the Kuroir Theme for TextMate by my pal Mario Ricalde (yes, Sublime Text uses TextMate theme files for its colour schemes).
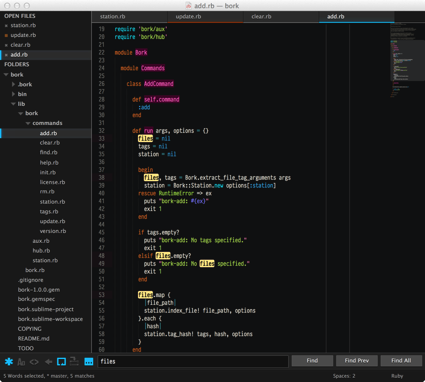
If you like a dark theme and prefer something a bit more minimal, the Nil theme with its bundled Tubnil color scheme looks great to my eye. It uses relatively few pixels, but uses them well.
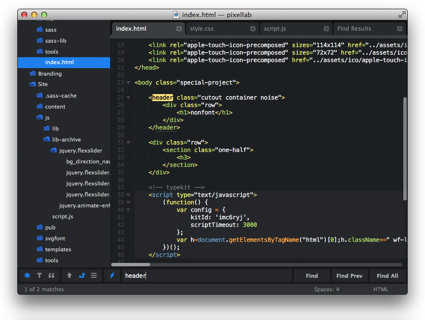
But the theme I’m rocking at the moment is Flatland, a new and very polished theme from digital agency Pixel Lab, who have embraced the “flat” aesthetic that is making inroads in mobile app design. I’m still toying with the colour scheme I’ll use with it, but I’m likely to stick with Tubnil (which is based on Tubster—author unknown but preserved by Christina Warren on GitHub) and tweak its background colour to go with Flatland.
Note: As of this writing, Flatland doesn’t install properly with Package Control (see below), so you may need to install it manually until they fix this issue.
Finally, you’ll want to use whatever monospaced font floats your boat. Personally, I’ve settled on (and paid for, happily) PragmataPro, but I still switch to monofur from time to time when I want a typeface that trades a little legibility for a lot of fun (hat tip to Dmitry Baranovskiy).
Add Some Missing Features
Sublime Text does a great job of including a very powerful yet restrained set of core features, while supporting a rich API and set of extension mechanisms for developers to build upon.
The first thing you’ll want to do once you get Sublime Text installed is to install Package Control, a package for installing packages from a vast package repository (which I help maintain).
Once you have Package Control installed, you can use it to install a set of packages to bestow Sublime with the specific features you need. Here’s my current list of essential, general purpose packages:
- ReadmePlease
The first thing you’ll do after installing any new package is open its README file to learn how it works. This package gives you a command to do just that. - ColorPicker
If you do any frontend coding, a proper colour picker in your code editor is an essential you probably didn’t even realise you were missing until now. - Emmet
This is another big one for frontend coders. Once you’ve written HTML and CSS with Emmet, you’ll never want to write it another way again. Fair warning: the keyboard shortcuts in the Sublime Text version differ from those presented on the website, so make sure to read the README. Hidden feature: Add"auto_id_class": trueto your User Settings file to add a class or ID to an HTML tag simply by typing ‘.’ or ‘#’, respectively. - Git and GitGutter
The Git package adds rich Git version control support to Sublime, enabling you to commit, branch, merge, rebase, push and pull with confidence, as well as peruse commit history and more right inside your editor. GitGutter adds to this little icons in the gutter that indicate which lines in an open file have been added/removed/modified from their committed version. - HyperlinkHelper
Okay, you caught me. I wrote this one. Still, if you write link-heavy markup (HTML, Markdown, LaTeX, etc.) such as blog posts, you’ll find this an indispensable time saver. - LineEndings
If you work in a mixed-platform development environment (e.g. Mac and PC), line endings will bite you now and then. This package makes the line ending types of open files easier to see and easier to change. - ToggleQuotes
Sublime’s core editing features can handle most common code edits efficiently, but changing the type of quotation marks on a string is an exception. This package makes it as easy as it should be. - MacTerminal
If you’re a Mac user, this will let you open your project folder in Terminal/iTerm. Dead simple, but a huge time saver. - SideBarEnhancements
The pop-up menu you get when you right-click a file or folder in the sidebar is simple and uncluttered, but if you’re a nerd like me you want a lot more in there. This package fills those menus out nicely. - SideBarGit
I don’t actually use this much, preferring to invoke Git commands from the Command Palette, but fans of TortoiseGit will feel right at home with their Git commands in their sidebar pop-up menus. - Vintage
This one’s bundled with Sublime Text, but is disabled by default. If you’re coming to Sublime from Vim and miss Command Mode, enable Vintage Mode and you’ll find a surprisingly complete emulation of Command Mode in Sublime. Personally I find it clashes a little with Sublime’s core functionality when it comes to text selection (if you select text while in Insert mode, you’ll need to hit ESC twice to deselect, and end up in Command Mode), but if you’re used to working in this modal fashion you’ll love having it in Sublime.
Recommended Settings
Sublime’s defaults are pretty good, but there are a few settings changes that are worth making if you understand what they do. Put each of these in your User Settings (Preferences > Settings - User) file to override the factory defaults:
"ensure_newline_at_eof_on_save": true,
In Linux-land, all text files should end with a newline character. With this turned on, you’ll never see that annoying warning from Git that a file doesn’t end with a newline.
"highlight_line": true,
Once you get used to your editor highlighting the line that contains your cursor, you’ll feel lost without it.
"highlight_modified_tabs": true,
Provides a nice visual cue to help you spot modified files you’ve left open and unsaved.
"scroll_past_end": true,
This might be just me and the way I read, but I like to have the freedom to scroll down sometimes, even when there isn’t any more of the file to show.
"show_tab_close_buttons": false,
I’m enough of a keyboard-heavy user that I almost never need to close an open file using my mouse. Getting rid of the buttons to do so reduces visual clutter and leaves more room for filenames in my tabs.
If you want to browse more “look and feel” preferences like these, open the Default Settings file (Preferences > Settings - Default), but remember not to edit that “factory defaults” file directly. Instead, copy the settings you want to modify into your User Settings file and set them there.
Learn the Editor
It’s fair to say I didn’t come to appreciate Sublime Text fully until I put together Up and Running with Sublime Text 2 for lynda.com. There is decent documentation available for all of the editor’s features, but it can be hard to find the impetus to go read it all.
Like most other code editors, Sublime Text rewards whatever time you put into learning it properly; so whether you use my course to do it or not, I recommend you take the time to learn what this thing can do.
In particular, the find/replace and text selection features, as well as automation features like snippets and macros hide a lot of power that isn’t easily discovered.
Even the free sample videos from my course will show you some easily overlooked features that I consider essential to using Sublime Text effectively:
Split Window Layouts
Goto Anything
Multiple Selections
(Sorry for the Flash movies. HTML5 versions are viewable on lynda.com.)
I hope you’ll check out the full course, and regardless, enjoy getting familiar with Sublime Text.